Notifyre users can create fax cover sheets that can then be used when sending faxes.
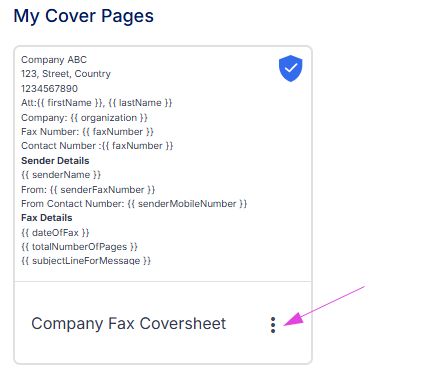
Fax coversheet example:
This guide covers:
- How to create a fax coversheet
- How to use Mail Merge Tags in your coversheet
- Available Mail Merge Tags for coversheets
- How to set a default coversheet for your account
- How to edit, clone or delete a fax coversheet

How to create a fax coversheet
- Login to the Notifyre Dashboard
- Select Settings on the left navigation
- Click on Cover Pages
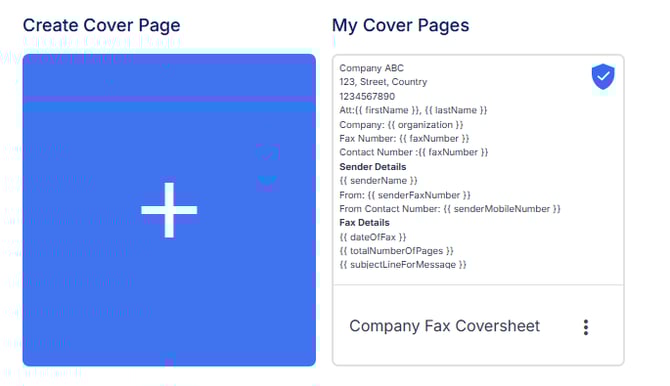
- Under Create Cover Page Click
 or select from the available fax coversheet templates.
 - Enter a Cover Page Name
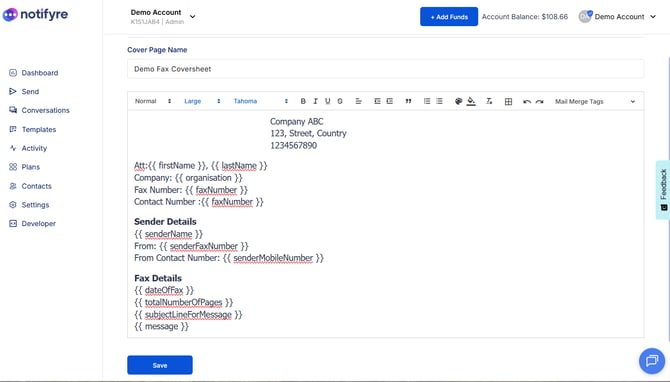
- Use the Editor to create your Cover Page
- Use the Preview button to view your Cover Page
- Click Save. Your Cover Page will now be visible under My Cover Pages
How to use Mail Merge Tags (Personalisation Fields)
- In the Fax Coversheet Editor
- Click on the Placeholder dropdown menu
- Select a mail merge tag from the list e.g. First Name, Last Name or Email
- Create your fax cover sheet
- Click Save
Upon sending these tags will automatically populate with data found in the saved contact details, sender details and the fax transmission details.
Coversheet mail merge tags (Personalisation Fields)
Fax Recipient Details
- { firstName }
- { lastName }
- { organisation }
- { email }
- { faxNumber }
- { mobileNumber }
- { cf2 }, { cf1 }, { cf3 }, { cf4 }
Fax Sender Details
- { senderName }
- { senderFaxNumber }
- { senderMobileNumber }
- { senderMobileNumber }
Fax Transmission Details
- { dateOfFax }
- { totalNumberOfPages }
- { subjectLineForMessage } - Enter custom text when sending a fax. The cover page template must include the subject line merge tag for the field to appear in when sending a fax.

How to set a default coversheet for your account
- Once you have saved your Cover Page
- Select the the three dots
 and click Set as default. The blue shield icon will appear will appear indicating that this coversheet has been selected to use as the default.
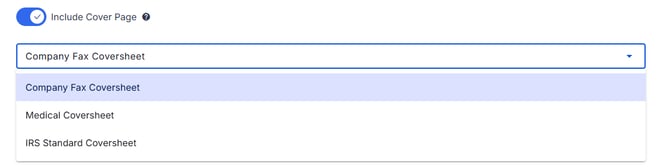
- When you send a fax toggle on Include Fax Cover Page , the default fax coversheet will be selected and show first in the list of your coversheets.
How to edit, clone or delete a fax cover sheet
1. Click on the 3 dots next to the coversheet and select from the below options to take the desired action.
- Edit – Allows you make changes to a saved Cover Page.
- Clone – Allows you to create a duplicate copy of the selected Cover Page to then edit.
- Delete – Allows you to delete the selected Cover Page.