Notifyre users can manage fax settings within their Notifyre account, this includes general settings, email to fax senders and fax to email receivers, delivery notifications and more.
How to navigate to Fax Settings
- Login to the Notifyre Dashboard
- Select Settings on the left navigation
- Select Fax from the dropdown menu
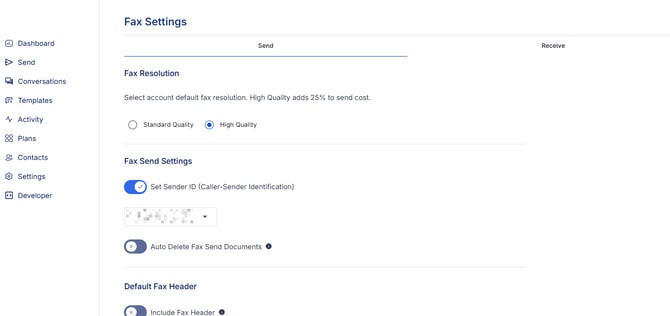
Send Fax Settings
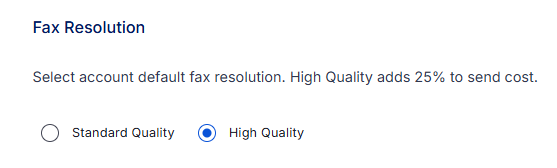
Fax Resolution
Standard fax quality is enabled by default. Select high quality fax sending for higher resolution when sending. Enabling high quality adds 25% to the total send cost.
Set Sender ID (Transmitting -Subscriber Identification)
Set a default Sender ID for all faxes sent from the account. Choose from the list of pre-approved sender ID's. If no Sender ID required, toggle OFF and the system will allocate a shared number as the 'From' fax number.
Auto Delete Fax Send Documents
System will delete the page content of all faxes sent immediately after confirmation of send success or failure of fax delivery. Deleting fax pages does not delete the sending record (meta data) for the fax from your account.
Default Fax Header
Enter a fax header to use on all faxes sent from your account. The header should be alphanumeric and contain maximum of 21 characters.
Email Notifications for Fax Activity
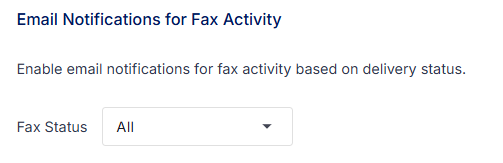
Choose which delivery notifications to receive via email.
- Select All to receive fax delivery notifications for both successful and failed faxes
- Select None if you do not wish to receive delivery notifications to email. You can monitor all sent and received faxes via the Fax Activity Reports in your account.
- Select Successful to receive notifications for successfully sent faxes
- Select Failed to receive notifications for faxes which failed to deliver
Manage Email to SMS Senders
Add an email address to enable fax sending from email. Please see How to add approved email to fax senders to your Notifyre account.
Receive Fax Settings
Receive Fax to Email
Add the emails you wish to receive fax. An email notification will be sent for all faxes received to your fax number. Option to include the fax file as an attachment (default ON).
Auto delete fax from storage
System will delete the page content of all faxes received immediately after fax delivery as email attachment. Note: To activate auto-delete there must be an email address on the fax number. If receive fax as attachment is also off, auto-delete cannot be applied.
💡 Click Save to save all changes made to Fax Settings before leaving the page.