This guide explains how to send SMS messages using Notifyre’s online platform. For instructions on sending SMS via email or API, please refer to the Email to SMS and SMS API guides. In this guide you will learn how to send text messages and about the additional (optional features) to use when sending SMS.
- How to Send SMS
- SMS Opt-Out Link for Subscriber Management
- SMS Templates
- SMS Scheduling
- SMS Personalisation
- Unicode & Emojis
You can send SMS via the Notifyre dashboard on your computer, smartphone or tablet.
⚠️ If it's your first time sending a text message you will need to verify your phone number in your Notifyre account before sending SMS. Account sending limits are also applied until account verification is completed. To fast track this contact our team.
How to send text messages using Notifyre's online portal
- Login in the Notifyre Dashboard
- In the left navigation menu, select Send.
- Choose SMS from the dropdown menu.
-
In the From SMS Number field:
-
For Australian accounts, the default is to send SMS via the Notifyre System Number. You may also select any approved custom sender ID or dedicated virtual mobile number from the dropdown menu.
-
For US accounts, you must send SMS using an approved dedicated virtual mobile number which is only available after 10DLC registration is complete. This registration is required due to mandated carrier compliance regulations.
-
- In the To SMS Number field: Enter the destination mobile number, or if you have saved contacts in your address book enter the contact name or contact group name and select
 or hit Enter or Tab on your keyboard to add. You may enter multiple mobile numbers, contacts or contact groups to send an SMS Broadcast
- (Optional) Select a SMS template
- Enter a reference: Enter text to identify the SMS message in your Activity Reports (100 characters limit). If this field is left blank a unique ID will be created for tracking purposes.
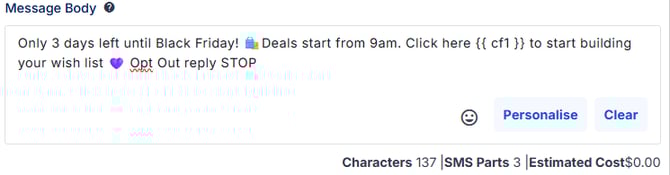
- In the Message Body field: Enter the content of your SMS message. You can personalise each message using personalisation fields such as the recipient’s first name, last name, or custom fields like appointment times or discount codes. You can also include emojis and Unicode characters to enhance your message tone. Please note that using personalisation or special characters may affect the final character count and number of message parts. See SMS Character Limits for more information.
- Preview your message in the right-side preview window

- When you're ready to send Click Send

Additional features for sending SMS via Notifyre
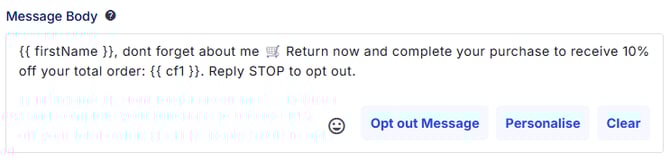
SMS Opt-Out for subscriber management
Unsubscribe feyword replies
Notifyre users can automatically manage opt outs using the following keywords:
- STOP, stop
- UNSUBSCRIBE, unsubscribe (only available when sending from 10DLC number in the US)
When a recipient replies to the number using one of these keywords they will be automatically opted out from receiving future SMS messages within your Notifyre account.
To add a Opt-out Message click this when crafting your text message and the text "OPTOUT STOP" will add to the end of your message. 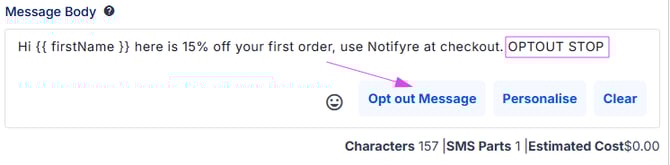
Unsubscribe Link
Australian account users can add an unsubscribe link to an SMS by simply toggling ON this option so it turns blue (toggled OFF by default).


When sending SMS to a new contact and has Opt-out link enabled, the contact will be automatically added to your contact list.
Learn more about how to automatically manage subscriber opt-outs
SMS message templates
SMS templates allow you to create and save reusable message content, making it faster and easier to send consistent communications. Templates can include personalisation tags (e.g. first name, appointment time) to customise each message for the recipient. They're ideal for common messages like reminders, alerts, or promotions, and help reduce errors, save time, and maintain brand consistency. Learn how to create and use SMS templates
SMS scheduling
 You can schedule an SMS to send at a specific date and time.

To schedule an SMS, simply select the toggle ON so it turns blue (toggled OFF by default) and select the date and time by clicking the calendar icon ![]()
Scheduled SMS sends can be viewed and cancelled via SMS Activity.
SMS personalisation
You can add custom personalisation tokens (mail merge) to your SMS sends. Simply click Personalise and select the personalisation token you wish to use. The personalisation token will automatically populate when you send an SMS to a contact or contact group. Learn about SMS personalisation fields and how to set them up.
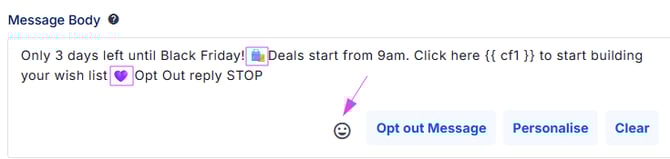
Unicode & Emojis
Notifyre supports the use of Unicode so you can add an emoji to your SMS send. Simply click ![]() to view the full list of emojis that you can add to your SMS. Click on the emoji to add it to the message. Learn more about Unicode & Emojis and how this impacts total characters and message costs.
to view the full list of emojis that you can add to your SMS. Click on the emoji to add it to the message. Learn more about Unicode & Emojis and how this impacts total characters and message costs.